Import from a Flat File or Excel
ONIXEDIT PRO allows you to import all types of flat files as well as Excel and to convert them automatically into ONIX files. You have a specialized module (optional with the regular edition) that will help you create, save, open, and exchange import scripts adapted to your needs.
ONIXEDIT can import and convert these four types of flat files:
• CSV Files
• Tabulated Files
• Fixed-length Files
• Excel 2003 or higher
If your files contain descriptive text which may include carriage returns, you must use CSV, fixed-length or Excel files. Tabulated files cannot be used for this purpose.
If you import Excel files, be sure that:
• Your data begin at the first or second line of the Excel sheet. Your import script may be configured to ignore the first line if this one contains labels.
• Your data are located in the first Excel sheet.
• Your Excel file was produced by Excel 2003 or higher.
To access the import module, use the "Import" function from the File menu (F4). A dialogue will appear, giving a choice of two options:
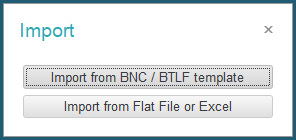
Choose "Import from Flat File or Excel".
Then, you must choose if you want to create an Import Script that will produce an ONIX 2.1 or ONIX 3.0 file. Because ONIX 2.1 and 3.0 are so different, an import or export script is dedicated to a specific ONIX standard:
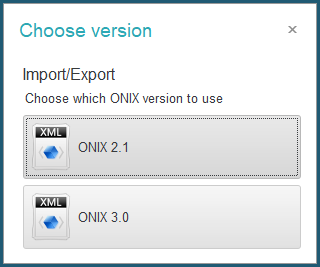
Click on the button that corresponds to your choice.
The Flat File Generic Import/export tool appears with a selection dialogue offering 3 options:
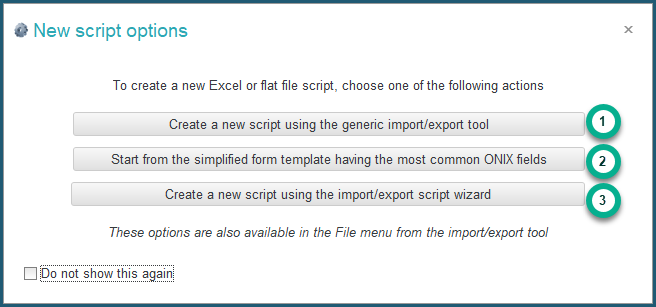
- If you click on the first button "Create a new script...", the selection dialogue will close and you will get access an empty Flat File Generic Import/export tool:
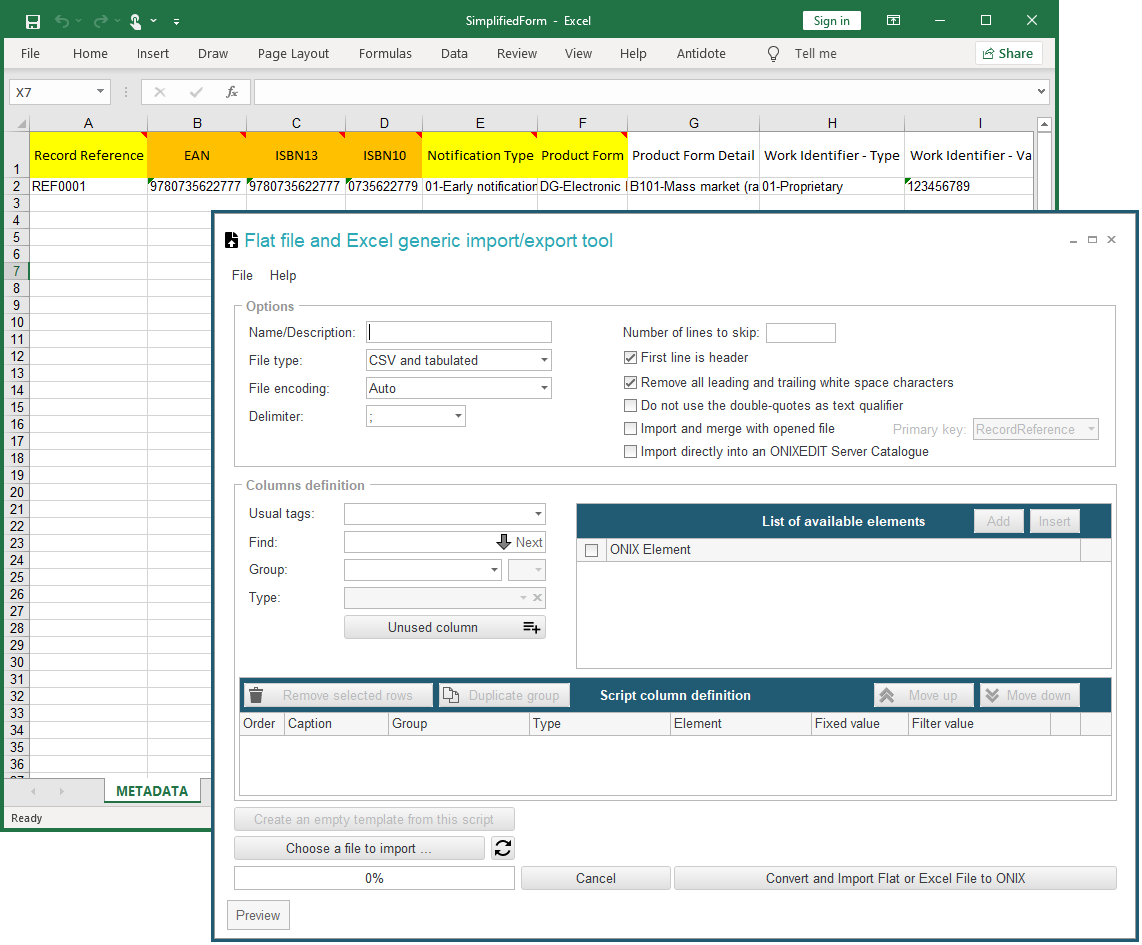
- If you click on the second button "Start from the simplified form template...", ONIXEDIT will make a copy of a predefined import/export script with its corresponding Excel file that provide all the ONIX fields available in the simplified form. You will then be asked to indicate where ONIXEDIT should save the copy and it will show you the corresponding import script and it will also open the Excel template matching it:
- If you click on the third button "Create a new script using the import/export script wizard", ONIXEDIT will then open a specialized wizard that will help you create your import/export script. See Using the Import/Export wizard section for more details.
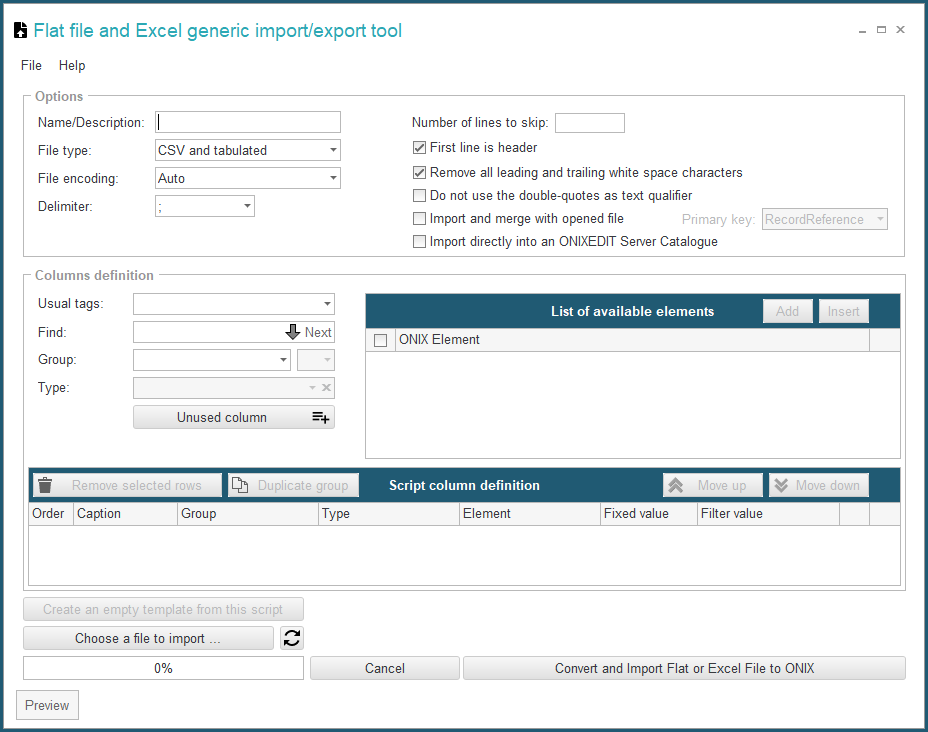
The Flat File Generic Import/export tool dialogue allows you to create new import/export scripts and to save them for later use. At the top of the dialogue, you will see the Options panel:
- Name/Description of your script is mandatory. It is used by ONIXEDIT to default the name of your import/export script file.
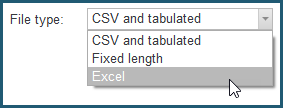
- Choose the file type that your script will manage. You have three possible choices:
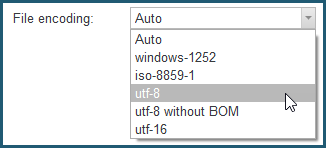
- If the file type is not Excel, you must indicate the File encoding which is "Auto" by default. With Auto encoding, ONIXEDIT will try to determine the file encoding of the flat file to import. You may also force the file encoding to a specific value among the following:
- If you chose CSV and tabulated in the step above, you must next choose the character which separates the columns of the file to be imported:

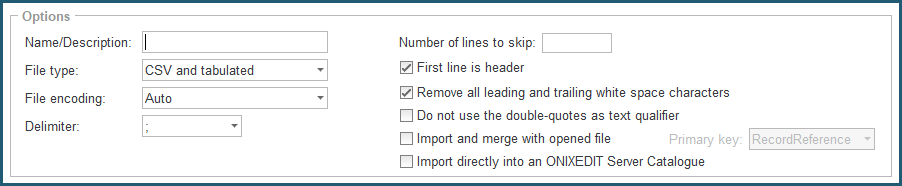
- At the top right of the Options panel, Indicate whether the first line of your file is a data line or a header line. If it is a header line, you should check the following box:

- Then, decide if you want to remove space characters at the beginning and at the end of all the values that will be imported from your source file. This option is checked by default:

- If your file enclosed text values with double quotes, check the following option. This option is unchecked by default:

- You may also use ONIXEDIT Import/Export tool to make batch updates to your ONIX files. See section Making batch updates for more details.

The Columns definition panel is where you will define which column of your flat file corresponds to which ONIX field:
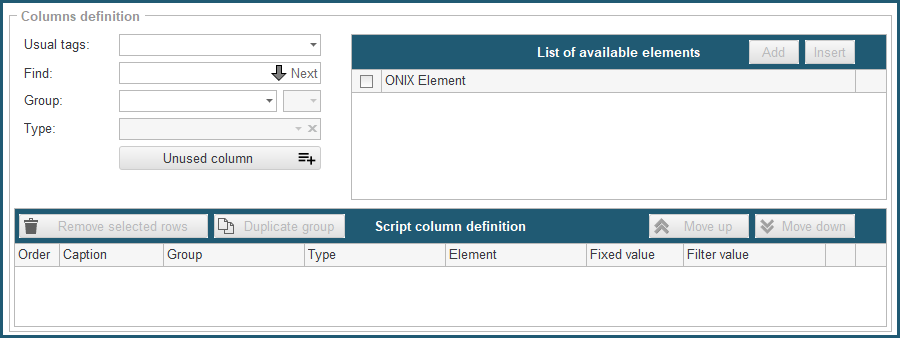
In the left-hand side section, you will find the different ONIX elements, labelled with their original English names from the ONIX standard. These elements are classified by ONIX groups:

The "*" group contains all the fields that are found in the first level of an ONIX title and which are not repeatable. When a group is selected, the scrolling menu at the right indicates that it is repeatable when it is activated and shows a number from 1 to n. This is the menu for sequence of the group:

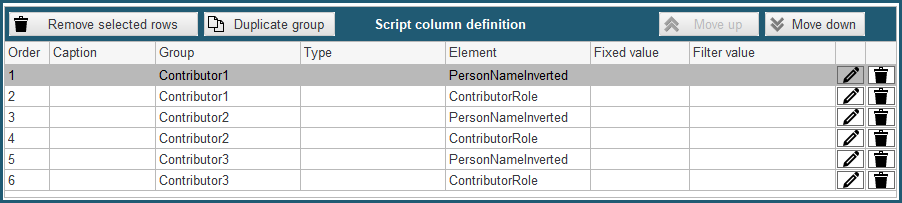
A repeatable group may thus be used as many times as you wish, as dictated by the number of columns in relation with this group in your flat file. For example, if you have three columns Author1, Author2, and Author3, you should then use three "Contributor" groups.
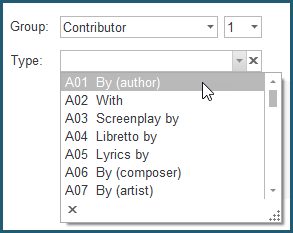
Once the group is identified, you may optionally choose to indicate the Type of the group that you want to add. The type is used within an ONIX group to define the nature of the information to be imported. For a contributor, for example, type is the ContributorRole:
If you do not indicate a type, you may ignore this information, which will then be left blank in your resulting ONIX file; or import it if it is part of your flat file. Let's look at an example in the Contributor group. If your flat file is set up like this with the possibility of three authors per title:

You will thus choose the type A01-By (Author) since you know that the contributors found in this file are authors, not illustrators or translators. You will then place the three authors in the column definitions list for your flat file:

On the other hand, if your flat file contains a definition of the type of contributor for each entry like this:

As the type is not known in advance, you place it in the column definition list to correspond with your flat file as follows:
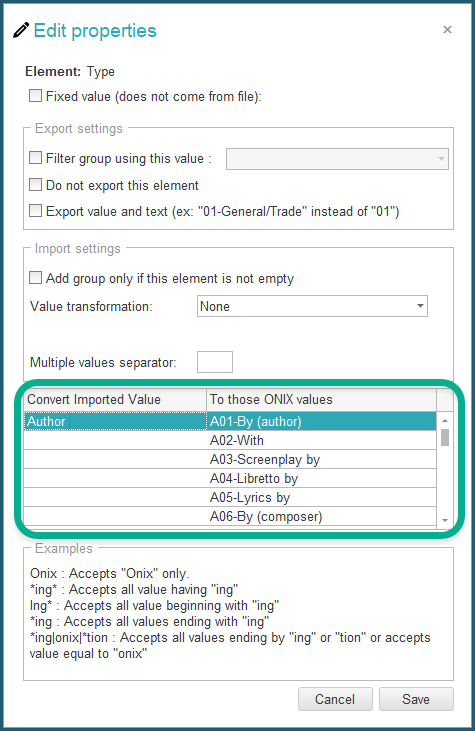
However, values which are found in our flat file for the ContributorRole element do not correspond at all with the values expected by the ONIX norm. We must therefore establish a lookup table identifying each possible value in our flat file. To do this, you just click on the property editing button for the first Type element (Line 2):

A dialogue appears with all the values accepted by the ONIX norm. You just input the corresponding values from your data file:
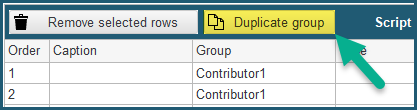
Helpful Hint #1: If you don't want to repeat this data capture for the same matching values for the two other authors, you can just use the Duplicate Group button at the bottom of the list. The properties of all the elements of the group will be copied in the same way, so you will not have to input them over again:
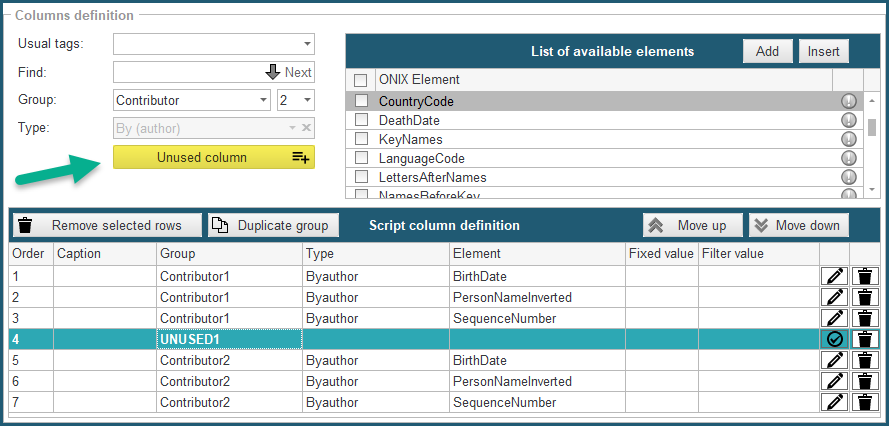
Helpful Hint #2: The Import Column Definition provides a contextual menu that you can show a right click of your mouse inside the Import Column Definition area:

With the help of this menu, you can:
• Move up or down one or more lines;
• Duplicate a group;
• Remove one or more lines;
• Cut and paste one or more lines;
• Insert anywhere an unused column.
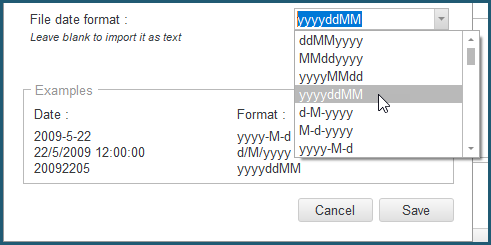
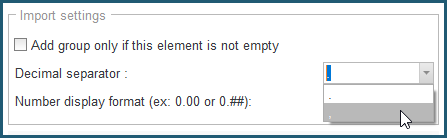
Helpful Hint #3: Fields of the type Date and numerical fields such as the price of a book requires special attention and you may need to edit their properties. If you don't get the expected result, you can try to define the date format that is found in a flat file as well as the decimal character. It is important to note that a single date format and a single decimal character can be supported in any one column from a flat file:


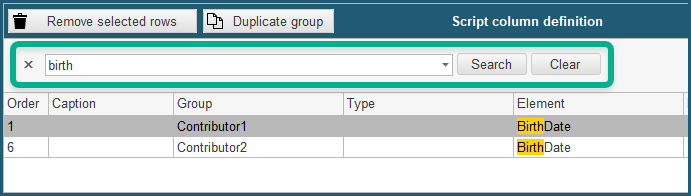
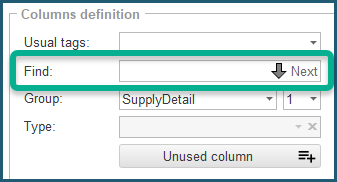
Helpful Hint #4: If you don't know which group contains a particular ONIX field, you can use the search tool. You just input the word you need and ONIXEDIT will automatically position you on the first ONIX tag which contains this word. Then use the Next button to review all the ONIX tags targeted by your search until you find the one you are looking for:
When you want to use the same ONIX data group several times, proceed as follows:
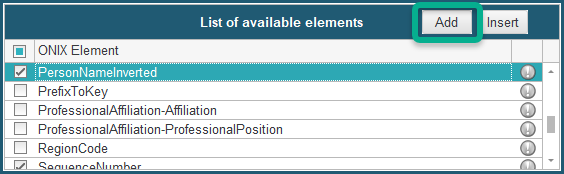
A - Select the ONIX elements to use and click on the Add button:
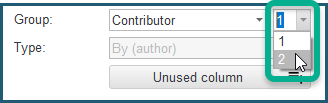
B - Then use the menu for the sequence of the group to go to the next in sequence:
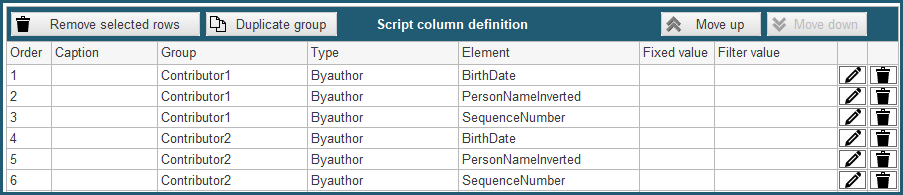
C - Repeat step A. You will obtain this:
Once you have placed them in the list, the elements can be moved or deleted as needed.
If the flat file contains one or more columns that you want to ignore, you can add an unused column and move it as required:
If your flat file contains superfluous columns positioned to the right of the columns to be imported, you do not need to add corresponding unused columns in your column definition list. The columns which don't have a correspondence will simply be ignored by the import mechanism.
You can also fix an ONIX element value. For example, if you have an internal identifier within your company, in addition to an ISBN-13, to identify each of your titles as follows:
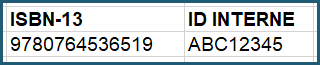
You first place a ProductIdentifier of type ISBN-13:
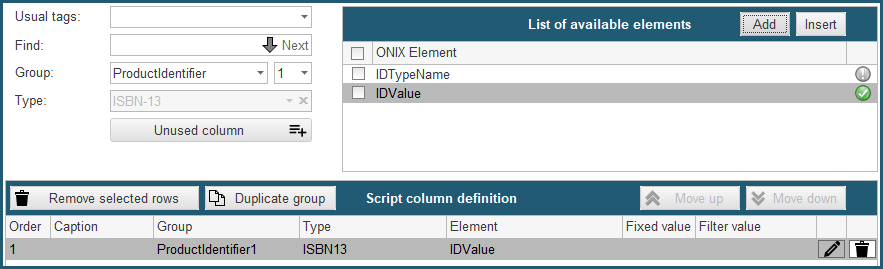
This is followed by another ProductIdentifier of type Proprietary, to which you add the element IDTypeName to specify the name of this proprietary identifier:

Even though a column called IDTypeName doesn't exist in your flat file, you can, however, give it a constant value by clicking on the properties button for this field:

You will then see this:

In the resulting ONIX file, you will obtain something like this:
<ProductIdentifier>
<ProductIDType>15</ProductIDType>
<IDValue>9780764536519</IDValue>
</ProductIdentifier>
<ProductIdentifier>
<ProductIDType>01</ProductIDType>
<IDTypeName>Title ID</IDTypeName>
<IDValue>ABC12345</IDValue>
</ProductIdentifier>
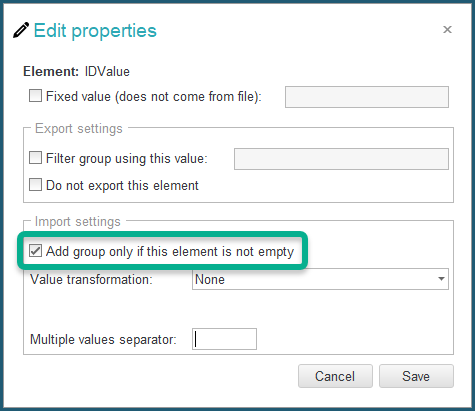
However, setting fixed values may introduce side effects. In the example above, if column 2 is empty, the import will produce a second Proprietary ProductIdentifier with the ID Type name "Title ID" with no value which is invalid in the ONIX standard because the ID Value is mandatory:

To solve this problem, you just have to click on the property button of the IDValue Element and check the option "Add group only if this element is not empty":
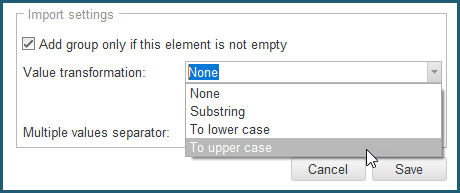
You also have the capability to apply some basic transformation on imported value:
If you want to import multiple prices under the same Supply Detail group, you can proceed as follows:
A- Add your first price column:

B- As soon as a first "Price" element is placed, a new set of price elements are added in the list of available elements:

If you then add a second "PriceAmount" to the import/export column definition list, then a third will be made available and so on:

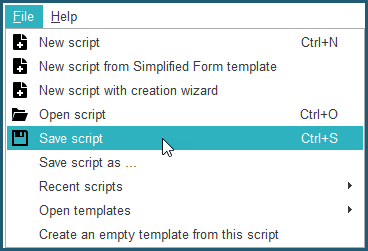
When you have completed the column definitions for your flat file, you must save your import script in a file on your disc, using the File/Save Import/Export Script menu:
You can always recover this file in order to modify it or simply to apply it to a flat file needing to be converted. These files can be shared with other ONIXEDIT users, and can also be used for bulk conversion of flat files to ONIX files, thanks to the console application OnixEditImport.exe, which is installed at the same time as your ONIXEDIT application (Please see the section Bulk Import of Flat Files).
Running the import script.
Once the import script is complete, you simply select your flat file using the "Choose a File" button, and convert it using the "Convert and Import a Flat File to ONIX" button:
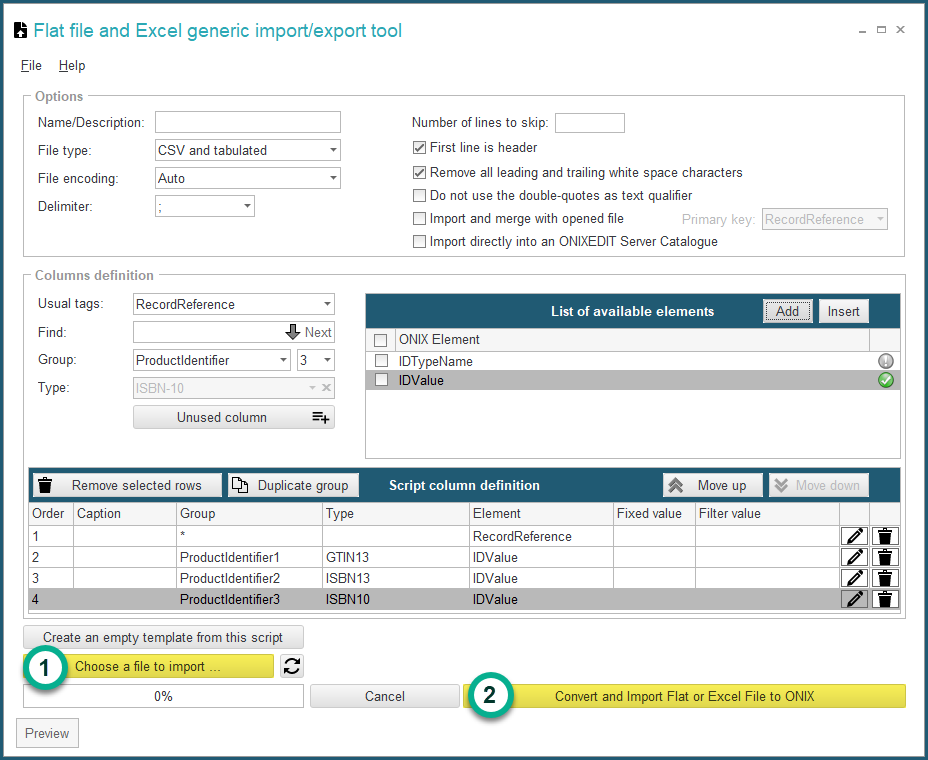
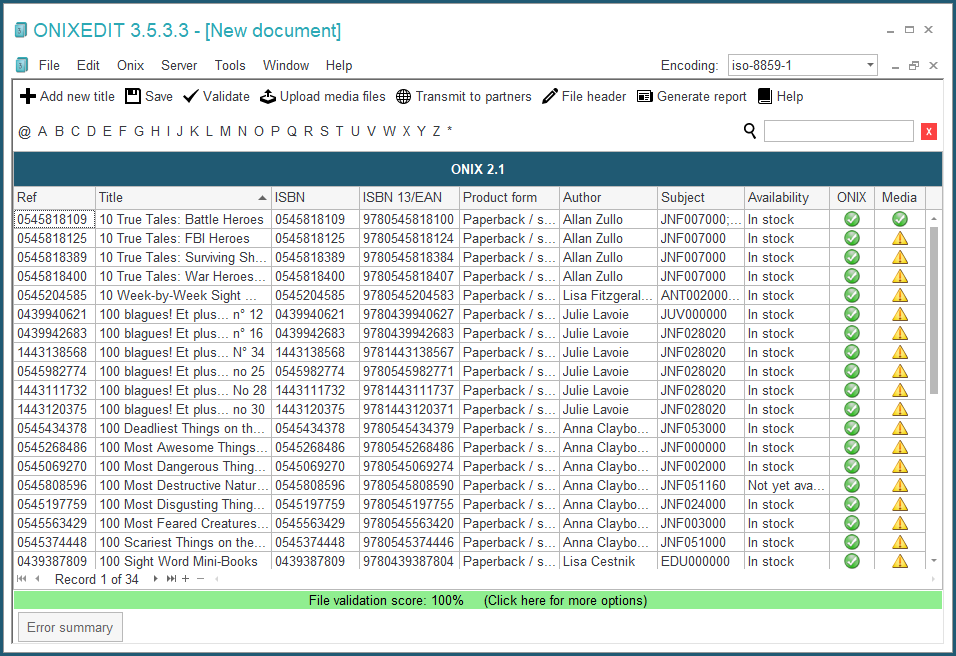
Your flat file will be converted into an ONIX file:
For your convenience, ONIXEDIT is installed with predefined import templates that you can use and customized to suit your needs. You will find it in the Open templates item of the File menu:
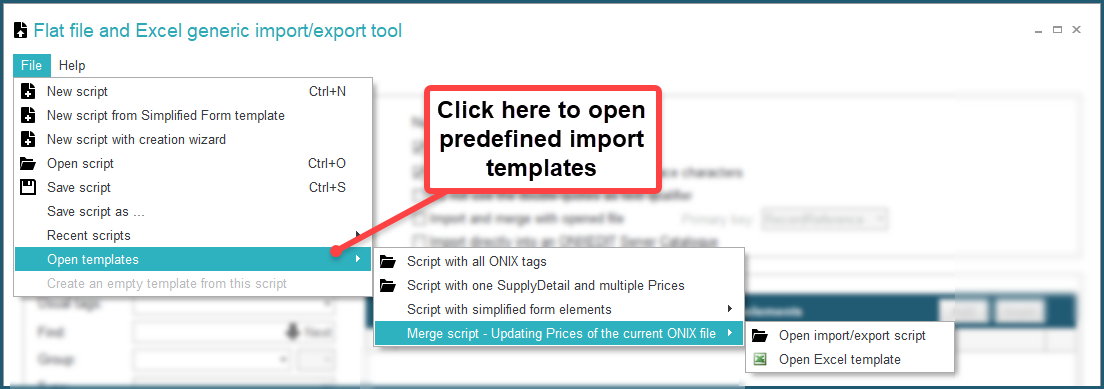
Here are short descriptions for each:
• Script with all ONIX tags: This script can be used either as an Import or an Export script and contains all the ONIX tags that are supported by ONIXEDIT (see Appendices A and B ).
• Script with one SupplyDetail and multiple Prices: This template provides an example of how to define a script that is able to import multiple prices in a same Supply Detail group.
• Script with simplified form elements: This menu item provides a good learning tool of ONIXEDIT import functions. Indeed, you get the ONIXEDIT import script ("Load script") as well as the corresponding Excel template with predefined data. The script contains all the ONIX tags supported in the simplified form. Both files are located in your ONIXEDIT program folder (usually "C:\Program Files (x86)\ONIXEDIT") and are ready to use.
• Merge script - Update Prices of the current ONIX file: See section Making batch updates for details about this template.
Helpful Hint #5: If your import script contains many columns, it could be useful to use the search function. In ONIXEDIT, all lists have an embedded search tool that you can activate using CTRL-F key: