Custom ONIX codes
From your ONIXEDIT Preferences, you can use the Server Edition / Custom ONIX codes tab to hide or show some ONIX codes from the lists in ONIXEDIT Pro and ONIXEDIT Cloud, and also create your own custom ONIX codes for internal use.
WARNING: If you define your own custom ONIX codes, your ONIX files could be declared invalid and rejected by your trading partners. Your custom codes will not be valid in the ONIX standard.
Note: You can still hide existing ONIX codes without any risks for the validity of your ONIX files.
1. Hiding / Showing existing ONIX codes
To hide an ONIX code from a list, proceed as follows:
From the Server Edition / Custom ONIX codes tab in the Preferences, use the ONIX version drop-down menu to select the ONIX version in which you want to make the changes:

Use the ONIX list drop-down menu on the left to select the list in which you want to hide one or more ONIX codes:
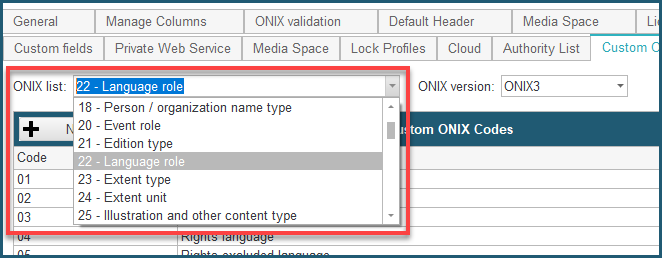
This drop-down menu contains all ONIX codelists, as you can find here.
Once you have selected a list, you will see a table containing all the codes available in this list:

To hide a code from this list, simply click on Hide, situated on the far right of the code you want to hide, as shown below:

Hidden codes are shown highlighted in a light red, as you can see on the screen capture below. To make the ONIX code show in the list again, you can simply click on Show.

Don't forget to save your preferences once you are done with your modifications.
2. Defining custom ONIX codes
To define your own custom ONIX code, proceed as follow:
Use the ONIX version drop-down menu to select the ONIX version in which you want to add a code:
Use the ONIX list drop-down menu on the left to select the list in which you want to add a new ONIX code:
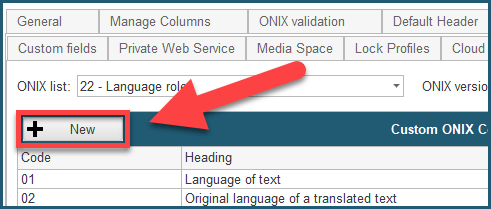
Click on the New button:
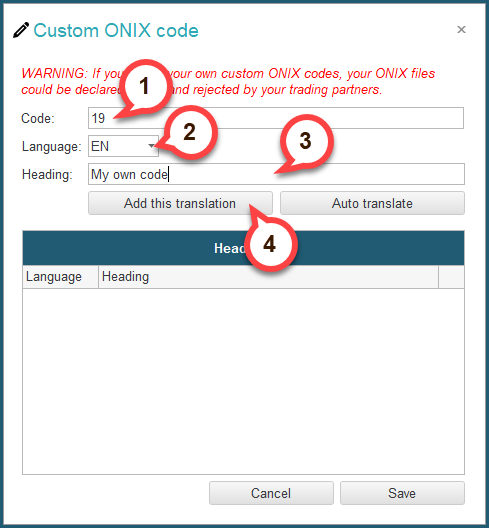
You will see the following Custom ONIX code dialog. Start by entering a code number for your new ONIX code (1). Then select a language in the drop-down menu (2), and fill the Heading field with a name for your code in the selected language (3). Finally, click on Add this translation (4):
Once you have done that, the version of your new code in the language you selected is added to the table below:
![]()
Optionally, you can now change the language in the drop-down menu, and manually add different translations for you custom code, by repeating the steps above. Alternatively, if you have the English version of your code added, you can simply click on Auto translate, and all translations available will be automatically added:
![]()
Once you are done, click the Save button in the bottom right corner. You will then see your custom code added to the ONIX list:
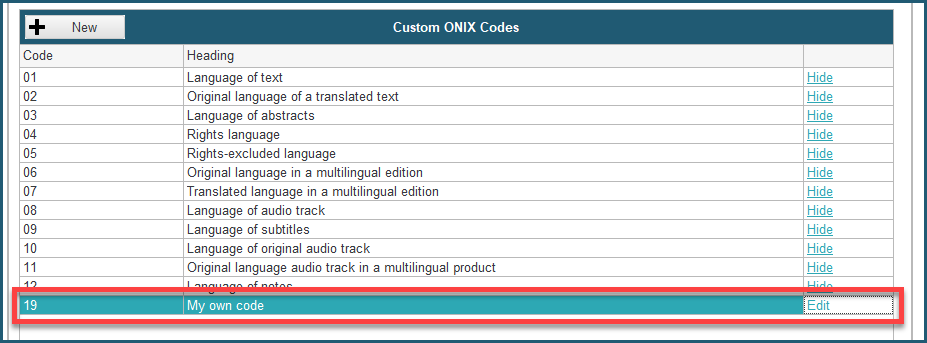
You can click on Edit to modify the code's parameters, or delete it.
WARNING: If you define your own custom ONIX codes, your ONIX files could be declared invalid and rejected by your trading partners. Your custom codes will not be valid in the ONIX standard.