Manage Users and their access rights
With ONIXEDIT Server, you can define two types of users:
- ONIXEDIT Pro users: You can invite any ONIXEDIT Pro user to collaborate to one or many of your ONIXEDIT Server catalogues. They will use ONIXEDIT as the client interface to get access to the authorized catalogues.
- Web users: If your ONIXEDIT Server account has the Web option, you can define as many web users as you want. Web users will be limited only to the maximum number of concurrent access allowed.
To define an ONIXEDIT Pro user, follow these steps:
1. Make sure to know the ONIXEDIT Pro serial number of the user you want to authorize.
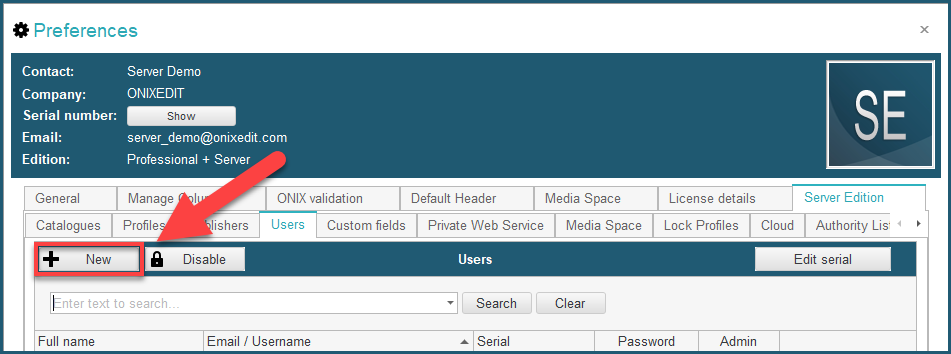
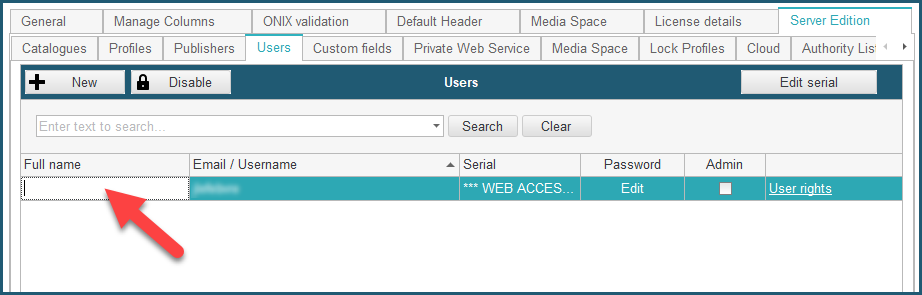
2. From the Preferences module, go to the Server Edition / Users tab:

3. Click on the New button above the list of current users:
4. You will be prompted to enter the email of the user associated with the ONIXEDIT Pro license:
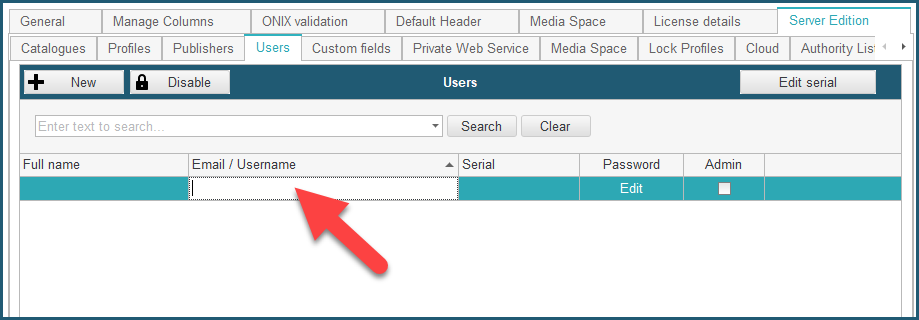
5. This must be the email address of a valid ONIXEDIT user. After entering the email, press TAB. If the email is valid and associated to an ONIXEDIT Pro serial number, the next step will be to enter that serial number:

6. Then, you will have to enter the full name of that new user:

7. Next, you will define a password for that user:
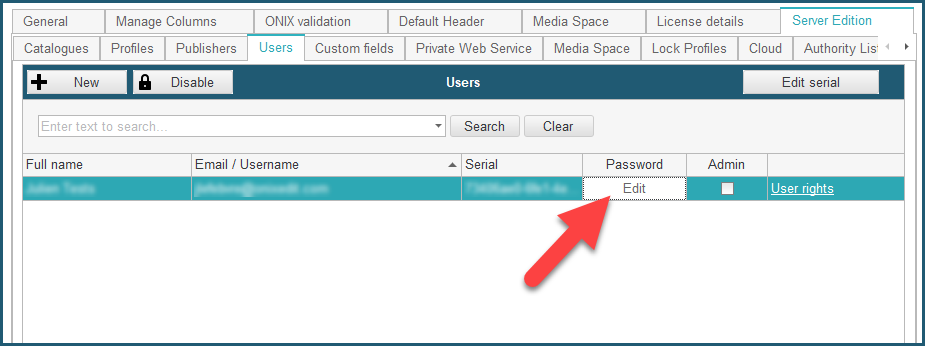
8. Then, you will have to define the access rights for that user:

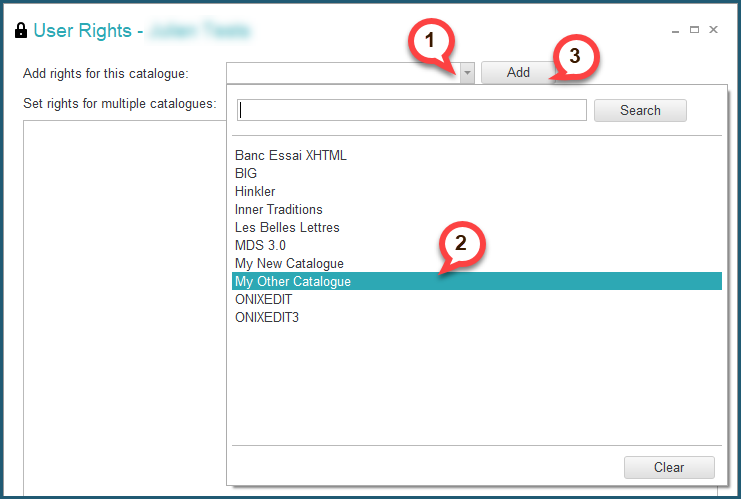
By clicking the User rights link on the right, you will get access to a dialog that will show all your current catalogues. You must then locate the ones you want to grant the user access to by clicking on the dropdown menu (1), selecting the catalogue you want to add (2) and clicking on Add button (3). (You can also use the search bar at the top to help find the catalogue you want to add):
Then you will have to check the privileges you want to allow for that user for that catalogue: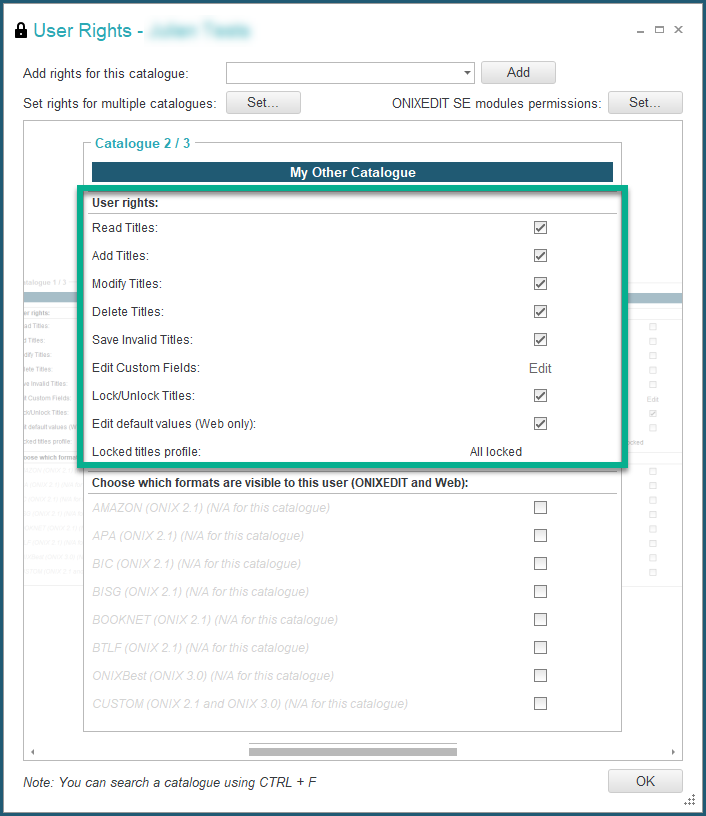
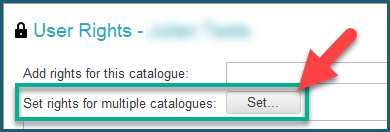
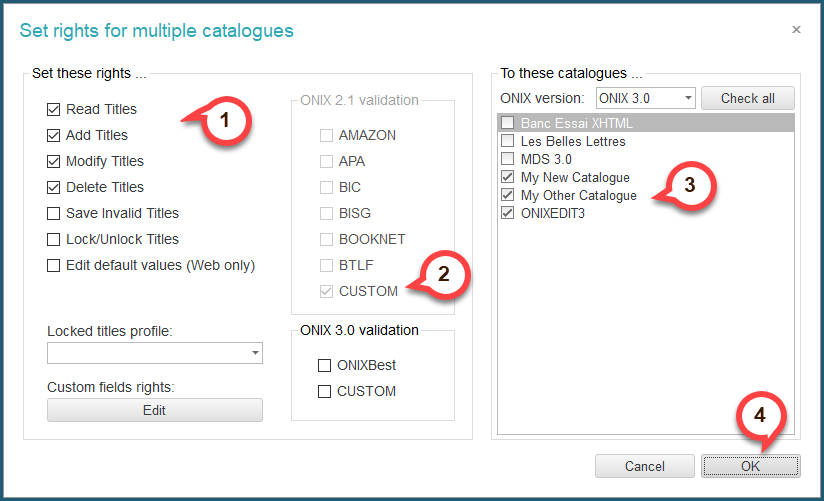
Optionally, you can use the Set rights for multiple catalogues tool to apply the same access rights to many ONIXEDIT Server catalogue in a single operation:
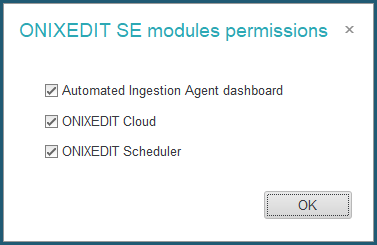
Moreover, you can use the ONIXEDIT SE modules permissions tool to define to which module will the user be granted permission:

9. Finally, Save your ONIXEDIT Server preferences, and you are done!
To define a Web user, follow these steps:
1. From the Preferences module, go to the Server Edition / Users tab:
2. Click on the New button above the list of current users:
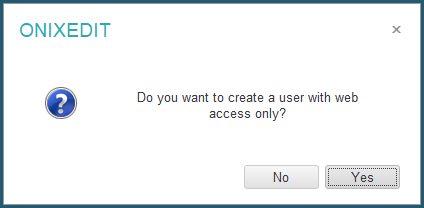
3. You will be invited to enter the username of the new web user. It could be any alphanumeric value:
4. After entering the username, press TAB. You will see the following confirmation dialog. Click on YES:
5. Then, you will have to enter the full name of that new user:
6. Next, you will define a password for that user:

7. And finally, you will have to define the user rights (same steps as for ONIXEDIT Pro users as shown above).