Define Custom Validation rules
ONIXEDIT PRO (and optionally with ONIXEDIT Regular) allows you to set Custom Validation rules to define mandatory fields specific to your organization. With ONIXEDIT Server, you can define Custom Validation rules for each of your catalogues and your profiles.
To set Custom Validation rules, proceed as follows:
1 a - To define custom values for an unassigned catalogue: From the Preferences module, go to the Server Edition / Catalogues tab and select Edit CUSTOM Validation rules in the action menu corresponding to the catalogue you want to modify:

1 b - To define custom values for a whole profile: From the Preferences module, go to the Server Edition / Profiles tab and select Edit CUSTOM Validation rules in the action menu corresponding to the profile you want to modify:

2 - Follow the same instructions as for defining Custom Validation rules for local ONIX files as defined from the ONIXEDIT User Manual.
3 - Then, close the Custom Validation form and save your preferences.
Once Custom Validation rules are defined for a catalogue, it won't be applied automatically. As for any other regular validation format, you first need to activate it with the "Edit other settings" tool and next, apply that validation to user access rights.
XPATH Validation Rules
You can now also define custom validation rules using XPATH expressions, which allows you to customize your validation to the maximum and gives you countless possibilities.
We will go through a simple example to show how you can define XPATH validation rules.
In this example, we will set an XPATH validation rule that checks that the Main Content Page Count is between 0 and 10000.
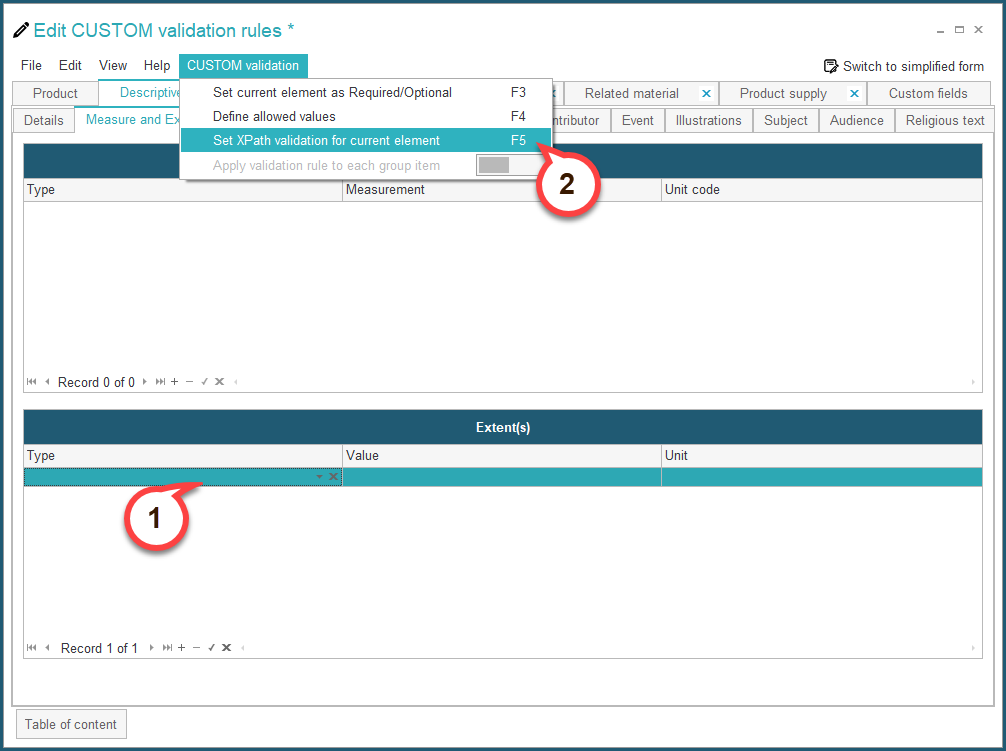
First, in the Custom validation rules edition form, locate the field to which you want to apply a validation, in our case, the Extent. Then select the field (1), and use the menu CUSTOM validation / Set XPath validation for current element, or press the F5 key (2):
You will see the following dialog. Click on the Add new rule button to define the validation rule:

The XPath validation rule edition screen will appear, here are the different components you can find on the screen:

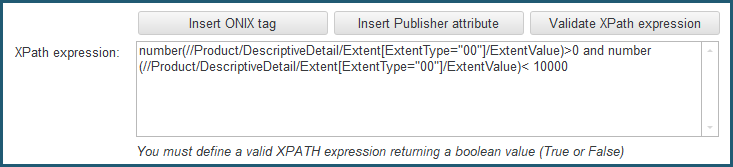
 XPath expression: This is where you will write the boolean XPath expression that defines the rule to create.
 XPATH Validation Rules examples: This shows two different examples of XPath expressions you could use to define a rule.
 Insert ONIX tag: Allows you to select any ONIX tag and insert its corresponding XPath expression.
 Insert Publisher attribute: Allows you to select any of your created publisher attributes and insert its corresponding XPath expression.
 Validate XPath expressions: Allows you to check if your XPath expression is valid or not.
 Error message: This is where you will select the error message that will appear whenever this custom validation rule is not respected by a title.
 Validation type: Here you can define whether every item in the field should respect the rule, or whether only one item needs to respect the rule.
To continue our example where we want to validate that the Main Content Page Count is between 0 and 10000, our XPath expression should look like this:
If you want more details on how to define XPath expressions, refer to the ONIXEDIT User Manual.
Next, we have to select the Error message. Click on the ··· button on the far right of the Error message field:

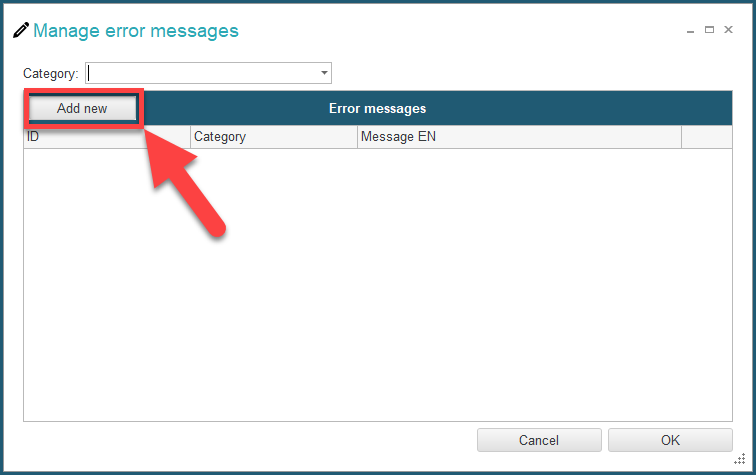
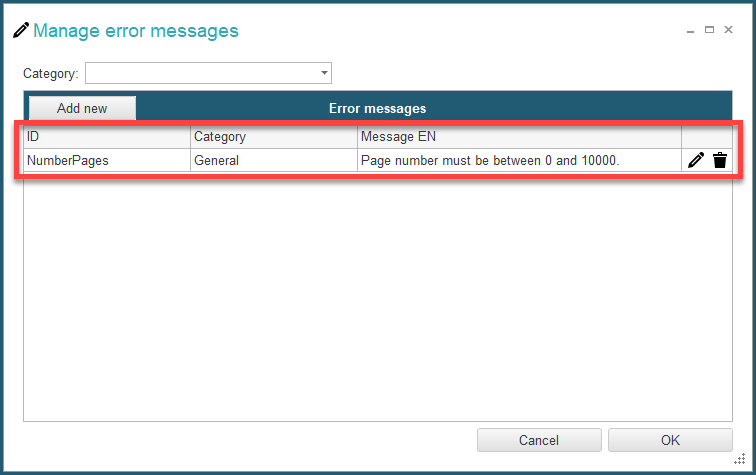
The Manage error messages screen will appear. This screen allows you to create error messages that will then be available to be reuse. To create a new error message, click the Add new button:
You will see the following Edit message dialog. Start by entering an ID to identify your new error message (1). Then you can add a category to classify your error messages in categories (2). Then select a language in the drop-down menu (3), and fill the Message field with the actual message for your error in the selected language (4). Finally, click on Add this translation (5):

Once you have done that, the version of your new error message in the language you selected is added to the table below:
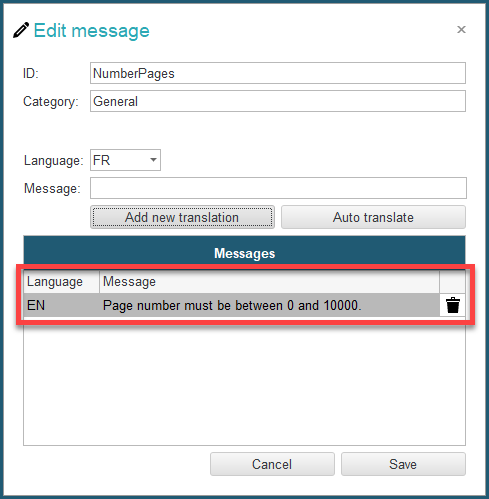
Optionally, you can now change the language in the drop-down menu, and manually add different translations for you error message, by repeating the steps above. Alternatively, if you have the English version of your message added, you can simply click on Auto translate, and all translations available will be automatically added:
![]()
Once you are done, click the Save button in the bottom right corner. You will then see your custom error message added to the list:
You can now select it and click OK. The error message is now selected and will be displayed when the rule is not applied.
Last step, we need to select our Validation type using the drop-down menu:

Once it is done, click Save to confirm. The rule we just created now appears in the list of XPATH validation rules for this element:

Now as you can see in the following screen capture, our new XPath validation rule works as intended:
