Edit other settings
You can edit many other settings which you can find in the Edit Other Settings part of the action menu.
You can again either edit these settings for a single catalogue, or for a whole profile.
You can access these settings like the following:
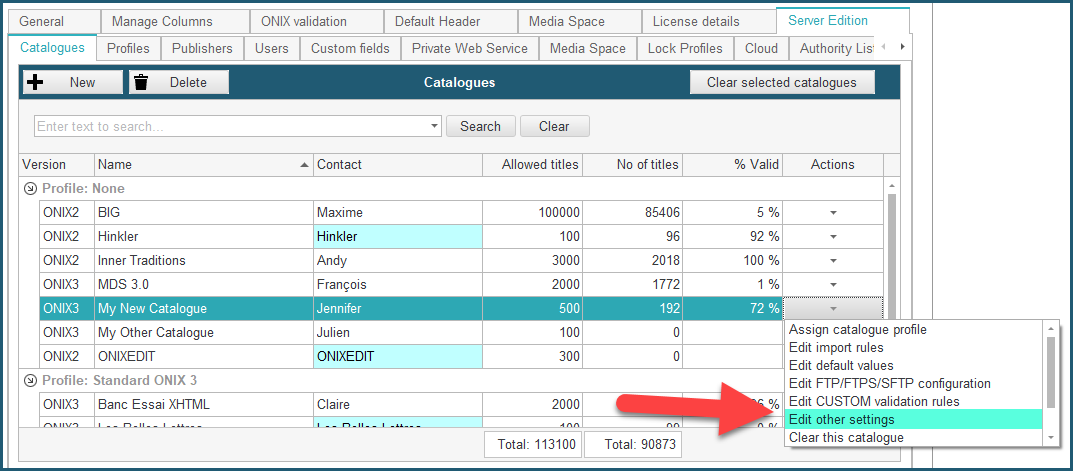
a - To edit other settings for a catalogue: From the Preferences module, go to the Server Edition / Catalogues tab and select Edit other settings in the action menu corresponding to the catalogue you want to modify:
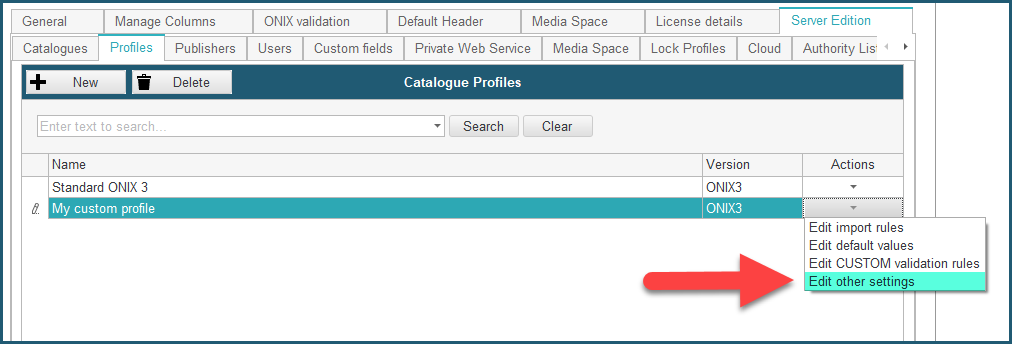
b - To edit other settings for a profile: From the Preferences module, go to the Server Edition / Profiles tab and select Edit other settings in the action menu corresponding to the profile you want to modify:
Note that for catalogues that are assigned to a profile, if you go to Edit other settings from the catalogues actions menu, some options will be disabled. To modify these options, use the action menu of the profile.
When you click on the Edit other settings button, the following dialog is shown:
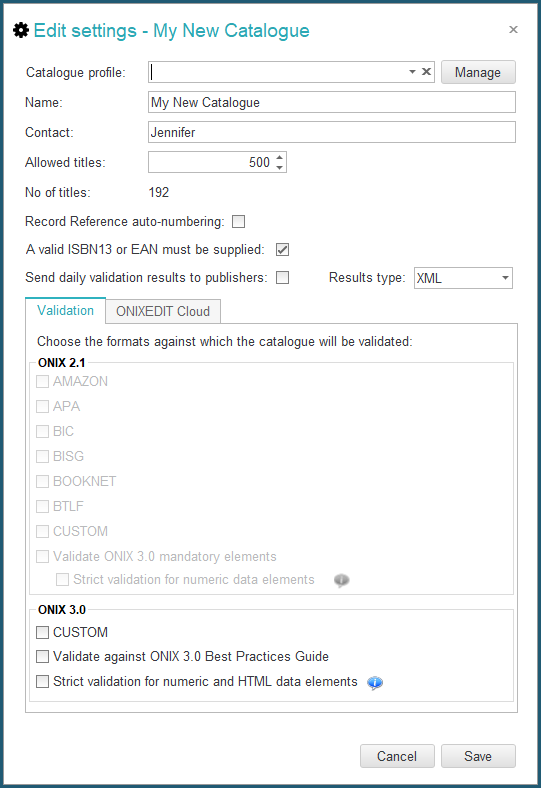
Using this dialog, you can define the following:
- Catalogue profile: Profile to which the catalogue is assigned to.
- Name: Name of the catalogue (same as in the catalogue list).
- Contact: Same as in the catalogue list.
- Allowed titles: a maximum number of allowed titles. If you leave this cell empty, there won't be any limit except the total number of titles allowed for your ONIXEDIT Server account.
- The Record reference auto-numbering option will produce a sequence of automatic numbers that will be assigned to every new title in that catalogue. Indeed, when a new title is created, you will see [AUTO NUMBER] in the Record reference field and it won't be modifiable:
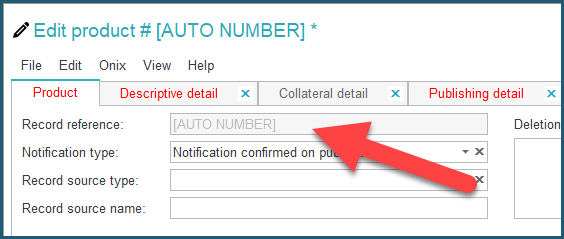
When the new title is saved, it will receive the next sequence ID available from the server.The sequence starts at 1 unless you change it to something else using the button Set next RecordReference value for Catalogues with Auto-Numbering activated that you will find under the catalogues list: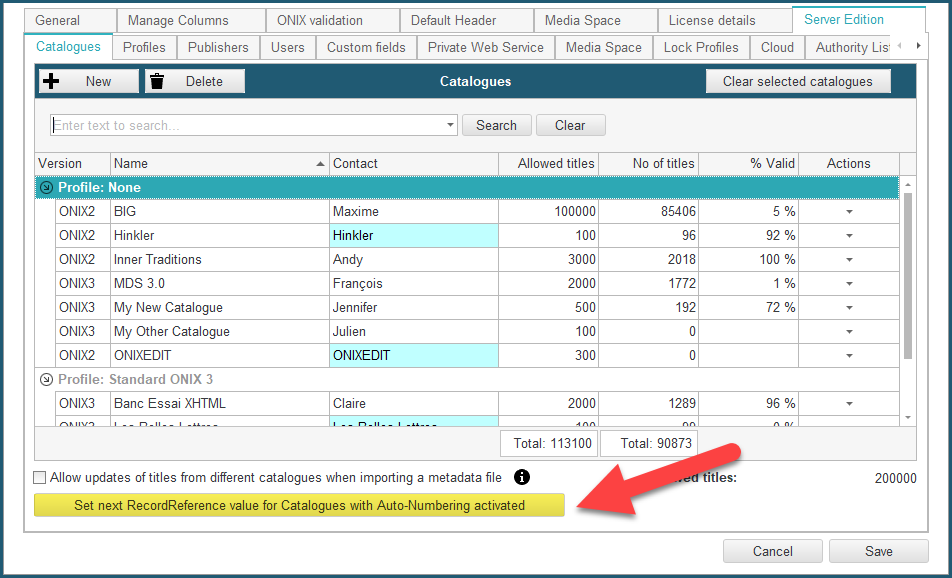
Under these settings, you will find 2 tabbed sections:
Validation section
Use this section to select the possible validation formats that you want to authorize for your ONIXEDIT and ONIXEDIT Cloud users. Only the checked options will be available in the User Access Rights form. Each validation format will add validation rules corresponding to best practices established by organizations such as Booknet Canada, BISG or EDItEUR. By default, only the basic validation rules established by the ONIX standard are applied.
ONIXEDIT Cloud section
The ONIXEDIT Cloud tab present options pertinent for those using ONIXEDIT Cloud with ONIXEDIT Server for ONIX metadata entry:
Under ONIXEDIT Cloud tab, you will find 3 sub tabs:
General
The following options can be set:
- Export format: By default, this is set to ONIXEDIT, which is the standard long reference ONIX format used internally by ONIXEDIT. You can change it to ONIXEDIT Short or any specialized format supported by ONIXEDIT (for ONIX 2.1 catalogues). The export format is used by the Web interface to produce the ONIX files that a user can get from the Action menu "Export selected titles to ONIX".
- Apply Import Rules to ONIXEDIT Cloud when creating or updating a title: Set this option if you want to configure the same rules for titles added or modified using ONIXEDIT Cloud as those defined for external metadata import. See Import Rules section for more details.
- Activate Shopify integration with ONIXEDIT Bookstore: If you activate this option, ONIXEDIT Cloud will show the ONIXEDIT Bookstore button at the top right corner over the main list. With this button, an ONIXEDIT Cloud user can bind an ONIXEDIT Server catalogue to a Shopify bookstore and make direct Shopify product updates from the ONIX metadata. Visit our ONIXEDIT Bookstore page for more details.

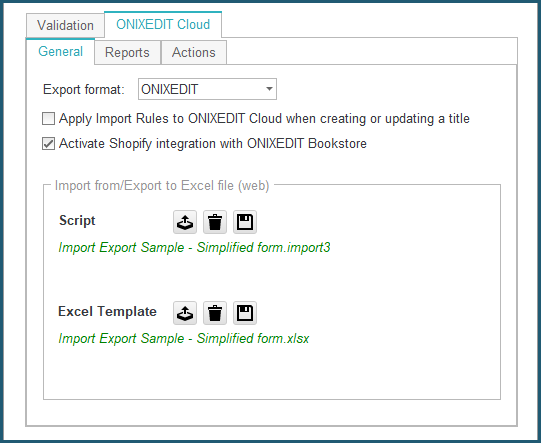
- The "Import from/Export to Excel file (web)" panel is used to set the ONIXEDIT import/export script and Excel template that can be used from ONIXEDIT Cloud as an alternative to create or export ONIX metadata to and from Excel files. The import/export script and corresponding Excel template that you will set for a catalogue will define some of the Actions menu items available to web users:

To define an Import/Export script and its corresponding Excel template, proceed as follows:
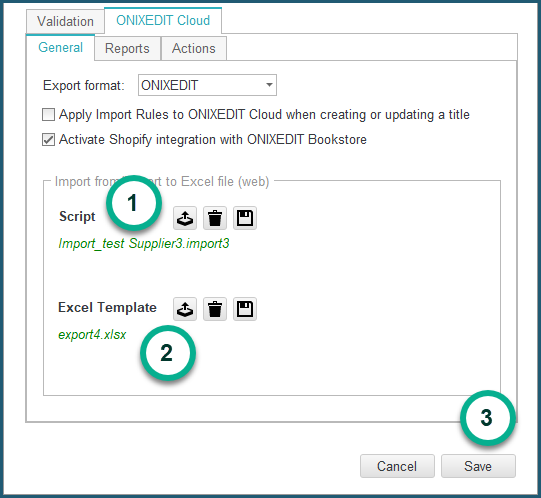
- Select on your PC a valid Import/Export script that was previously created with the generic flat file import/export module of ONIXEDIT. Refer to the ONIXEDIT User Manual for more details about how to create import/export scripts.
- Select the corresponding Excel file that matches the Import/Export script.
- Save the catalogue settings.
Reports
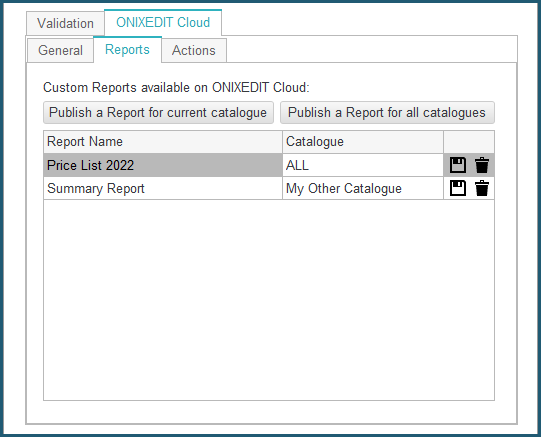
Under the Reports tab, you can define reports created using ONIXEDIT Report Builder tool and make it available for your ONIXEDIT Cloud users. You can define as many reports as you want and make it available for a specific catalogue using the Publish a Report for current catalogue button. You can also use the Publish a Report for all catalogues button and make the report available for all the catalogues defined in your ONIXEDIT Server account:
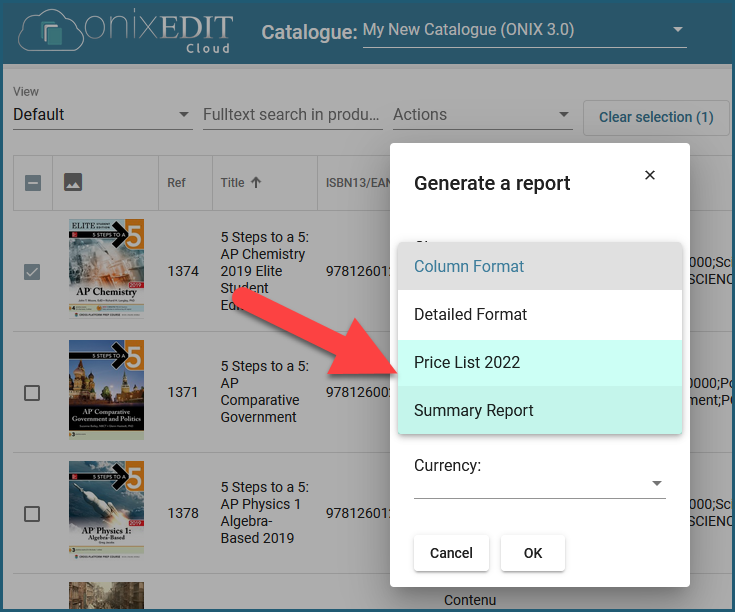
Once defined, the new reports will be available from the Generate Report action page of ONIXEDIT Cloud:
Actions
Under the Actions tab, you will find the FTP list actions as explained here.

You will also be able to define new POST actions to allow your ONIXEDIT Cloud users to transmit HTTP POST requests for selected ONIX titles to any web site for endless integration possibilities. To create a new POST action, click on the Add a new POST action button. A new form window will show up:

Complete the form above as follow:
- Caption EN: This is the caption you will see in the English interface of the Action menu at ONIXEDIT Cloud.
- Caption FR: This is the caption you will see in the French interface of the Action menu at ONIXEDIT Cloud.
- HTTP POST: This is the URL where the HTTP POST request will be sent.
- Title Selection:
- Selected titles only: this will authorize an ONIXEDIT Cloud user to select titles from the main list and send a POST request for it. If no titles are selected, the POST action won't be sent.
- All or Selected titles: same as the previous option except that when no title is selected from the main list, the POST request will be sent for all the titles in the catalogue.
- No title required: this option will allow transmission of the POST request without having to select any title.
- Optionally, a POST action can transmit a specific ONIX field for each selected titles from the ONIXEDIT Cloud list:

Once a new POST action is defined, ONIXEDIT Cloud users will be able to use it from the Actions menu:
