Manage Catalogues
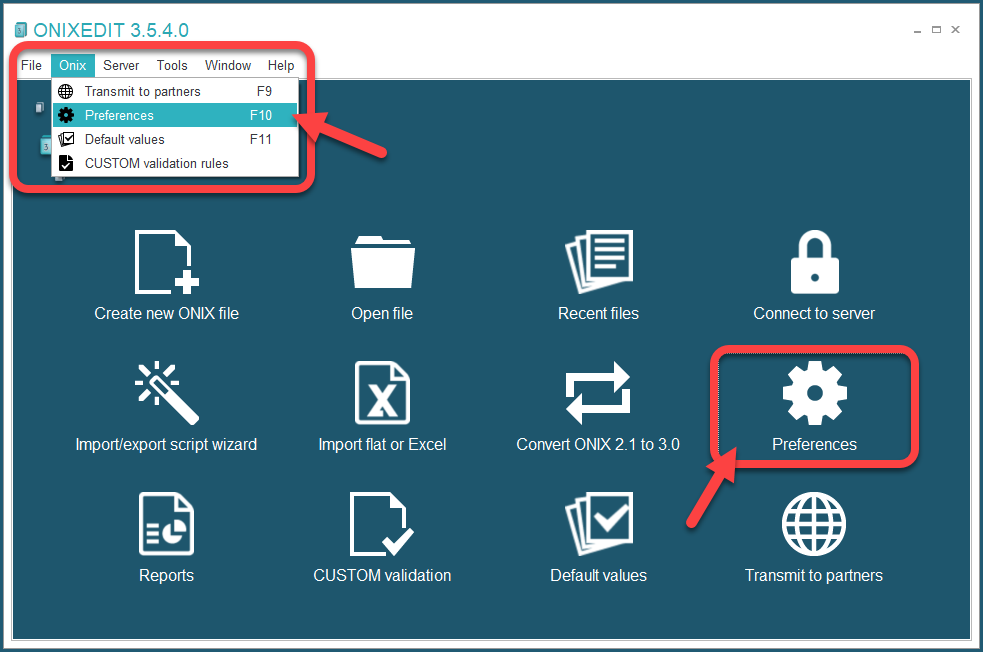
ONIXEDIT Server stores ONIX metadata (2.1 or 3.0) in isolated repositories called catalogues. Only the Server administrator is allowed to define catalogues. To do so, they must use the Preferences module of ONIXEDIT Pro (the preferences can be accessed via either the main menu Preferences button, the menu Onix / Preferences, or the F10 key, as shown in the image below.):
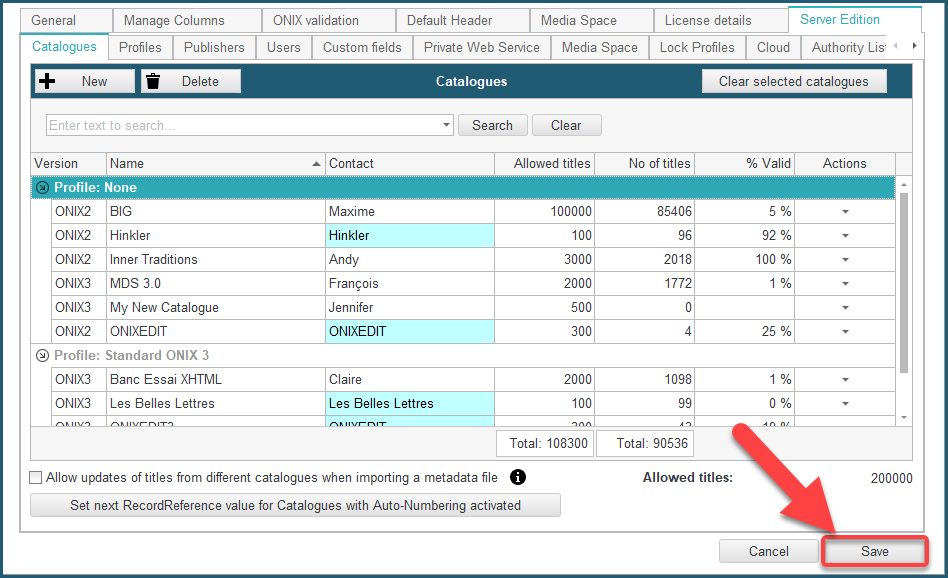
Once in the Preferences module, click on Server Edition tab, then Catalogues. You should see this screen:
![]()
To use ONIXEDIT Server Edition, you must create at least one catalogue. There is no limit to the number of catalogues you can create. The only limitation you may have concerns the number of titles you are authorized to define among all your catalogues (this limitation does not apply to ONIXEDIT Server "on premises").
To define a catalogue, click on the New button:

When creating a catalogue, you must determine the ONIX standard (2.1 or 3.0) of your new catalogue:
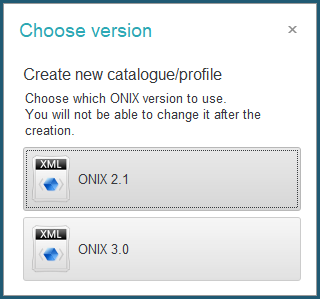
This choice can't be reverted. It determines how the titles you will create in your new catalogue will be validated and, of course, which kind of ONIX files you will be able to read or save with that catalogue.
Once your choice is made, a new catalogue record will be added to the catalogue list.
To complete it, you will have to:
1. Give it a name.
2. Give it a contact. (it may be simply a name, or an assigned publisher)
3. Give it a number of allowed titles.
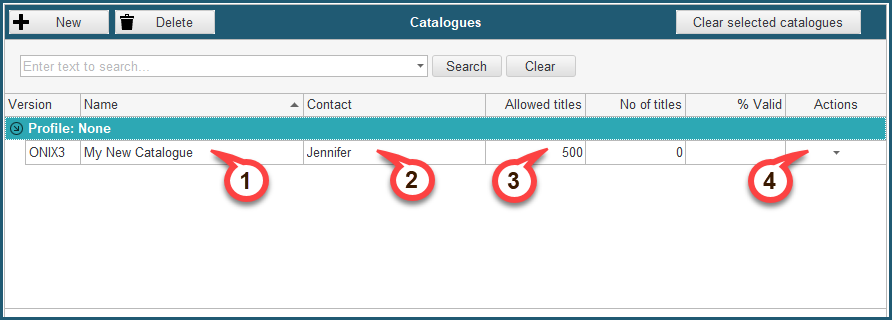
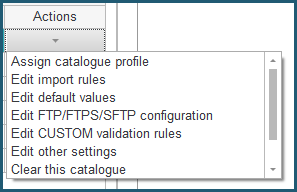
4. Optionally, more settings can also be found under the Actions menu on the far right:
Each time you create or modify a catalogue or its options, you will have to save your Preferences module to apply the modifications to ONIXEDIT Server. To do so, click on the Save button at the bottom of the Preferences window:
General Catalogue Options
Under the catalogue list, you will find one general catalogue option and a button:
- Allow updates of titles from different catalogues when importing a metadata file: See the section Allow updates on different catalogues.
- Set next RecordReference value for Catalogues with Auto-Numbering activated: This button allows you to set the next sequence ID for catalogues with the auto-numbering option. By default, the next ID is 1, but you can set it to any higher value.
Deleting a catalogue
If you want to delete a catalogue, you have to clear its content first. You won't be authorized to delete a catalogue if it contains any titles. Fortunately, you don't have to delete titles one by one as there is a handy function that will help you clear a catalogue's content quickly. To delete a catalogue, proceed as follows:
1. Select the catalogue(s) you want to delete:
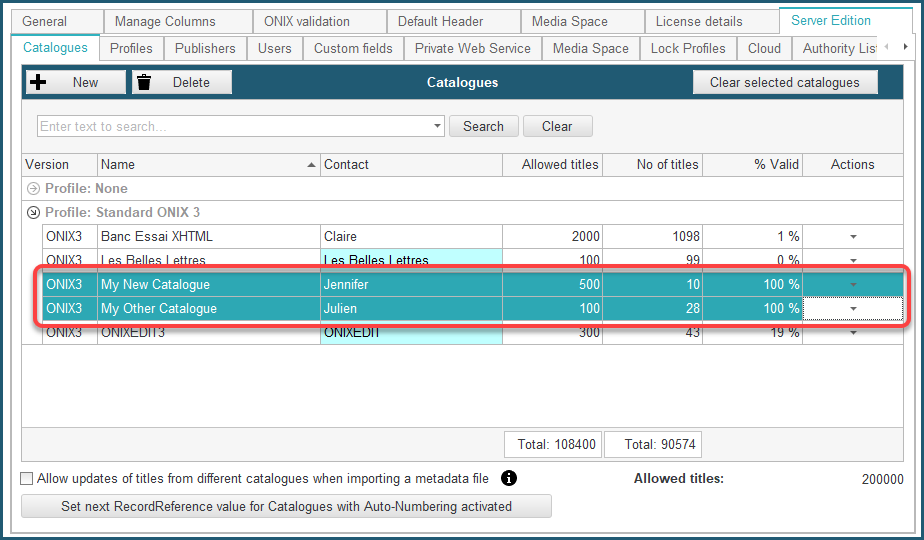
2. Click on the button Clear selected catalogues and confirm the action. Be careful, this operation is not reversible:
![]()
3. Once the catalogues are cleared, you can click on the Delete button and confirm the deletion of the selected catalogues:
