Presentation
The Main Title List is your entry point to ONIXEDIT Cloud. Using it, you can:
- Select an ONIX metadata catalogue to work with;
- Import/Export your books and ebooks metadata;
- Upload or Download your ONIX file;
- Search for specific titles;
- Modify or Create new ONIX titles.
- And much more.
Here is what the main title list looks like:

- The ONIXEDIT Cloud 4 logo: Click on this logo anytime to get back to the main title list.
- Catalogue drop-down list: If you have more than one ONIX metadata repository, use this drop-down list to select the catalogue you want to show in the main title list. A catalogue is like a distinct ONIX file and each one may contain one or several ONIX titles. For example, if you have chosen to maintain distinct ONIX 2.1 and ONIX 3.0 metadata, you will then have one catalogue for each standard. You may have more if you are using ONIXEDIT Server Edition.
- List View Selector: Use this drop-down list to select a different Main List presentation view.
- Full Text Search box: If you want an easy and fast way to search books by any words in your ONIX metadata, you should use this control. Just type the sequence of characters you are searching for and press "Enter". ONIXEDIT Cloud main list will then show you the corresponding books having the sequence of characters anywhere in their title. And the best of all: It is very fast!
- Advanced Search: If you need to search by more specific criteria, click on this button to show the advanced search panel. For more information on the Advanced Search tool, see the Searching titles topic.
- Title Index button: Click on this button to toggle visibility of the Title Index:

Click on any letter in this index to see the books with a title that begins with this letter in the current list. The @ button in the index allows you to see the titles that begin with a number or a punctuation character. Click on the * button in the index to get back to all titles from current list. - Title Selection Control: This control allows you to select one or more titles prior to applying an action from the Actions drop-down list. Using the Title Selection Control in the header of the list, you will select all the titles shown in the current page according to the page size (see item #15). You can also select each title individually by clicking on the Title Selection Control at the left of each title. For more details, see section Selecting titles.
- Clear selection button: Click on this button to reset the selection so no more titles will be selected (also clears selection on all pages of the list).
- Show Selected Products; Click on this button to show only selected products in the main list.
- Add New Title button: Click on this button to add a new ONIX title in your current catalogue. The new title will automatically appear in the ONIXEDIT Cloud 4 Entry Form ready for data entry.
- Main List Headers: Click on any column header to sort by that column. A first click will sort ascending, a second will sort descending.

- Individual title controls: At the right of the main title list, you will see 4 buttons for each title:

- Use the Info button to see when the title was created/modified and by whom. You can also get permanent links (ONIX and JSON) for your title that you can share with partners.
- Use the Edit button to show the Entry Form with the corresponding title.
- Use the Duplicate button to create a copy of the title and edit it with the Entry Form.
- Use the Delete button to delete the corresponding title from the current catalogue.
- Action drop-down list: This is a list of actions you can take on your ONIX titles (selected titles or complete list). For more information on the Actions drop-down list, see the Applying actions to titles topic.
- Validation Score: This control indicates the total validation score of the current catalogue. It corresponds to the percentage of valid titles (see item #18 below) among the total count of titles in the catalogue.
You can show valid or invalid titles simply by clicking on the options link of the validation score control:

- Pages control: The pages control allows you to set Page Size (the total number of titles you can see in the list at the same time) and browse pages.

- The Page size control allows you to set the total number of titles you can see in the list at the same time.
- The Position indicator provides information about the current page. In the picture above, the page size is set to 50. Thus the position indicator shows that we are currently at the first page (1 of 50) of a search result having a total count of 213 titles.
If the total count of titles is over 1000, ONIXEDIT Cloud will stop counting for performance reason. You'll then see this: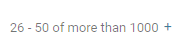
Clicking on the + sign, will force ONIXEDIT Cloud to complete titles count and show it back to you. - The Page browser control. Using these arrows, you can easily navigate through pages of the current search result.
- The upper right toolbar:
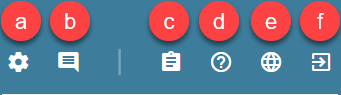
- The gear icon leads you to the settings menu:
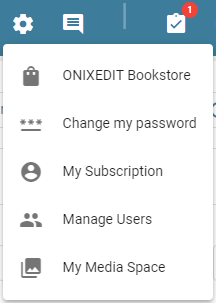
Use that menu to:
- Configure your ONIXEDIT Bookstore app if you want to directly transmit your ONIX titles to your Shopify Store from ONIXEDIT Cloud.
- Change your ONIXEDIT password.
- Consult/Edit your current ONIXEDIT Cloud subscription.
- Manage authorized users having access to your ONIXEDIT Cloud catalogues.
- Manage media files in your ONIXEDIT Media Space.
- At ONIXEDIT, we are very interested to get your feedback in order to continuously improve our ONIX system. Clicking on this icon will allow you to communicate directly with us and make suggestions...
- This is our new notification tool. When a new notification arrives, you'll be informed with a notification badge like this:
 For example, after requesting an export to ONIX or Excel, this is where the resulting files will be available. By clicking on the notification tool, you will see the links to download your exports:
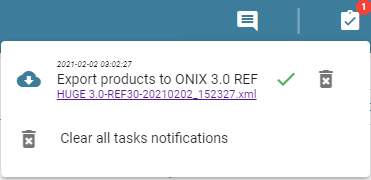
- The Help icon will show you this user manual. You can also activate the "Show help field" option to see a short help note on each field of the entry form when clicking on the question mark icon:

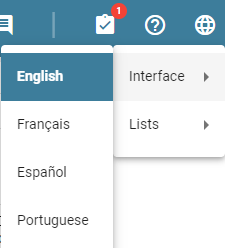
- Our new language tool allows you to set the interface and/or ONIX Lists language. We currently support 4 languages: English, French, Spanish and Portuguese:
- Click on this icon to log out from ONIXEDIT Cloud 4.

- The "Refresh Product List" button, allow you to apply the latest search and refresh the list with newly added or modified titles.
- The validation columns shows current validation status of each title. The number of validation columns varies depending on your current configuration.
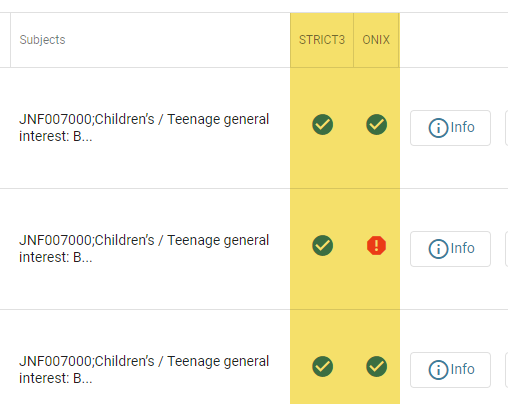
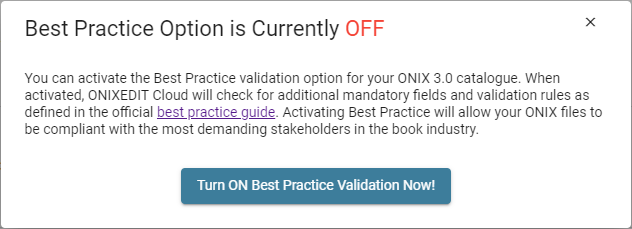
- The Best Practice option when turned ON, will activate additional validation rules based on the official best practice guide for ONIX 3.0 from EDItEUR: